Wednesday, 25 February 2015

Product Review: Mary-Lou Manizer!

Hey there gals!

Mary-Lou Manizer Packaging! 

Today, I will be reviewing the much talked about Balm Cosmetics 'Mary-Lou Manizer'! My heart nearly skipped a beat when I saw it in the in-flight magazine on a recent Aer Lingus flight for just 15euro. This little beauty can also be bought online on cloud10 beauty. I had wanted to try this for ages, but it wasn't very accessible, so I jumped at the chance to buy it over the weekend! Some people might think that highlighters are another unnecessary step in your make-up routine, but if you're like me and you can't get enough of them and think that they're one of the most important things to have in your make-up kit, then read on to hear how I got on with one of the most talked about products of the last few months..


So first of all, the packaging is vintage inspired, and I love it and also really like the names of the products! It's really cute and girly, and stands out from other products in my make-up bag which are mostly the classic black packaging. Though this is described as a honey coloured powder highlighter, I think it's more of a champagne colour.. There is a very subtle glitter going through this very buttery highlighter. I found this highlighter to be one of the easiest highlighters to apply and blend out of all the ones I've tried so far - and believe me there's been quite a few! It works well with either a blusher or a bronzer on top, or even on it's own! I've found myself using this not only on my cheeks, but on my cupids bow and on particularly dull days, the inner part of my eye and brow bone.


As you can see below, you only need to use a small bit of product as a little goes a long way! That makes it easy to go a bit over-board with this highlighter, so try to be light handed when dipping your brush into it, tap off the excess and you're good to go! On that note, this highlighter will last you forever as you only need to use a tiny bit, another bonus.. So for 15euro, this really is a bargain and in my opinion, a make-up bag must have! So much so, over the last few days I've found myself reaching for the Mary-Lou Manizer over my MAC Soft & Gentle *gasp*. 


After loving this Balm Cosmetics product, I can't wait to try out a few more! Have any of you used any other Balm Cosmetics products, what ones were you loving? Please comment and let me know what product I should try out next! Thanks for reading, hope you enjoyed it :) Keep an eye out for my next post over the weekend, which will be a haul post from the last few weeks!

Me with the Mary-Lou Manizer on my cheeks (apologies for my hair - it was a messy bun kind of day!). 

Love,
Becca. 
xox 


Tuesday, 24 February 2015

Wanderlust: Amsterdam.

Hello there interwebbers,

This weekend I travelled to Amsterdam for a little city break for my boyfriend and I, we had purchased the flights in November, so we were really looking forward to going! And, we're just back after a fun-filled weekend, and I can sincerely say, Amsterdam did not disappoint!


Day One: Friday. 

Our flight left Cork Airport at 6a.m., after such a early start we were glad to check-in to Citizen M Amsterdam City, and what a cool hotel! From the self-service check-in, to the iPad that controls everything from the 'mood lighting' to the black-out blinds, this was the most interactive and cool hotel I have ever stayed in. Though, the rooms are quite small, they are perfect for a couple when on a short break.. Only if your not a nervous pee-er though, as there is no separate bathroom, rather the toilet is encapsuled by a circular sliding door in the middle of the room, as is the shower! Definitely not for those who are bit on the shy side.. haha. The HUGE bed goes from wall to wall, and has the comfiest duvet and pillow - ideal after an early start! There is a massive flat screen tv on the wall over the bed, which too is controlled by the iPad. There is a selection of free movies (in English!), and English t.v. channels. The iPad also controls the temperature, the alarm clock, and the curtains.. It really is a cool novelty for the weekend :) The hotel is also a perfect location, it is about a 10 minute tram ride from Dam Square, and only 7 minutes from Schiphol airport - which is very handy!

On our first day, we did a bit of shopping (which I will share with ye in another post during the week!), and just strolled through the winding cobblestone streets and various markets, including the floating flower market which was beautiful! We went for dinner in the Lobby resteraunt in Hotel V Nesplein, just off Dam Square. We were really looking forward to this meal after reading some glowing reviews on Tripadvisor, however we were sadly disappointed.. Though the service, and atmosphere was brilliant, the food left a lot to be desired for these two foodies! After dinner, we took a stroll down the Red Light District, and were surprised by how safe the area felt with hundreds of stag and hen do's, couples and even families walking down the street, when in Amsterdam it is definitely worth visiting for a stroll, as it is an area unique to Amsterdam, although quite surreal! We then had a few cocktails in the hotel lobby, before hitting the hay!

Drinks in front of the stove in The Lobby! 


Day Two: Saturday. 

Day two started off pretty much the same as day one: raining! That didn't dampen our spirits though, we started our day visiting the Rijksmuseum and the iconic Iamsterdam sign.

Visiting the IAmsterdam sign and the Rijksmuseum.


We set off the day having lunch in the Hard Rock Cafe (a bit of a tradition of ours!) - you haven't lived unless you've had their chicken nachos and an Electric Blues cocktail <3

Hurricane & Electric Blues Cocktail in Hard Rock Cafe. 

We then went on a beautiful 75 minute canal tour around Amsterdam with the Blue Boat Canal Cruise company.. For only 14 euro each we were treated to the beautiful sights of Amsterdam, and given plenty of interesting information (and photo opportunities!) on our cruise around Amsterdam's beautiful canals. This was by far one of my favourite moments of our trip and would definitely recommend this tour to anyone visiting Amsterdam!

Me on the Canal Tour around Amsterdam!

We then visited the Body Worlds: Happiness Project in the city centre, which is an exhibit that houses real human Plasticine bodies that were donated to science., it deals with themes such as nutrition, disease, life, death, exercise, and of course since it's in Amsterdam - sexual activity! Though the information provided could be considered as basic biology, the exhibits themselves speak more than that. However, I wouldn't recommend this to those who are sensitive or have a weak stomach as some of the exhibits, though interesting, are quite disgusting and at times upsetting! For your 18euro ticket, you get about 2 hours in the exhibit, which is well worth the money.. Unfortunately, I have no pictures to post as pictures were not allowed!

Day Three: Sunday. 

Our last day in Amsterdam brought us some sunshine! The city looked even more beautiful when the sun was shining. We started by visiting the Ann Frank museum, and I would definitely recommend buying tickets online before visiting, as that allows you to fast-track the queue, which was roughly about 100-150 people long when we arrived, and were definitely relieved to be able to skip the queue since it was quite cold outside. The tickets were only 9euro online, and this bought you about 2 hours of a tour around the Ann Frank house and museum. Having read and watched Ann Frank's Diary as a child, this was one thing I was adamant about visiting from the start, and it was truly an eye-opening experience. Again, photos were not allowed! 

We were sad to say goodbye to Amsterdam after our fun-filled weekend but hopefully it won't be long until we're back again! Are any of you travelling to Amsterdam soon? Please comment and let me know what you plan to do - or if you have any questions on what I did! In the next few weeks, our wanderlust is bringing us to Copenhagen and I'm already excited for our next trip. Have any of you been to Copenhagen? What would you recommend? Thanks for reading :)

Love, 
Becca. 
xox 

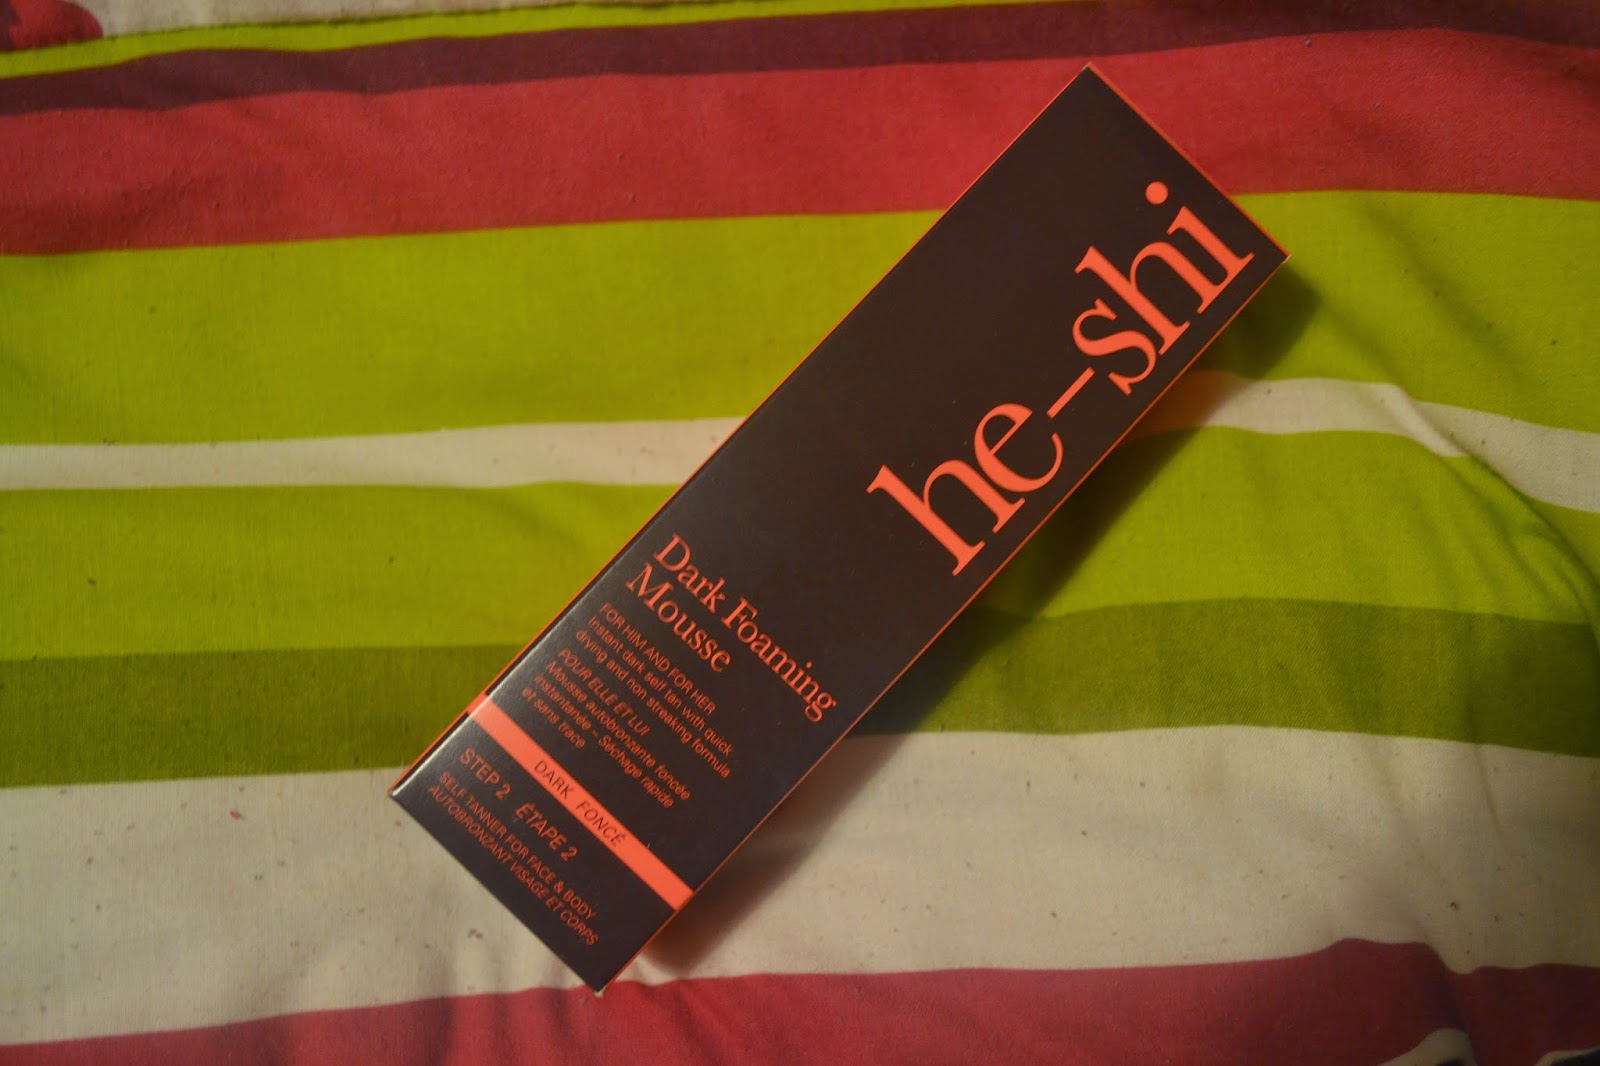
Product Review: He Shi Dark Foaming Mousse!

Hey there!


Today, I will be reviewing the much-raved about He Shi Dark Foaming Mousse! As I had not tried any He Shi products in the past, and frequently saw it being reviewed on other blogs and vlogs, I decided to give it a go as I was going for a weekend trip to Amsterdam, and this tan promised to be long lasting with the claim on the box saying it would last from 7-10 days, which was exactly what I wanted!


At 24.99 in Lloyd's Pharmacy, which is definitely on the steeper end of things when it comes to self tanner, I was expecting great results.. And, that's pretty much what I received! The tans guide colour is a bit scarily orange, but once you wash it off the next day, it leaves a lovely golden tan! The tan wasn't as dark as I was expecting, which was fine since I was going on a city break and didn't want to be too dark during the day, but since I like to be a bit darker at night time I would have been disappointed if I had put this on for a night out! Maybe next time I'll try two layers! This tan doesn't leave that biscuit-y smell, which both my boyfriend and bedsheets were grateful for, for me this was a huge plus because I hate the smell that most tans leave you with. Another pro of this tan is that it's formulated for use on the face too, which means that it doesn't stick to certain places of your face, and just gives you a nice golden tan on your face, which means you need less foundation (double yay!).

Another pro of this tan is that when its fading it doesn't leave you with that dreaded scaly look, instead the tan wears off nice and evenly albeit it doesn't last for 7-10 days, more like 5 days in my opinion!

I would recommend this tan if you have a few extra euros to spend on tanning products, and want a even golden tan for up to 5 days! Keep an eye out over the next few days when I'll have a blog post and what I did during my weekend in Amsterdam, and what I bought! Leave a comment and let me know any tanning products you've been loving lately! Thanks for reading :)

Love,
Becca.
xox


Thursday, 19 February 2015

Product Review: Mix Up the Voltage Lip Plumper!

Hi there!

Today, I'm going to be reviewing the Dreamweave & Co., Mix Up the Voltage lip plumper, which you may have seen making the rounds on blogs and YouTube channels over the last few months.. Also, a keen favourite with the cast of Geordie Shore and TOWIE, it promises bigger and fuller lips in an instant, and thanks to the enviable Kylie Jenner, making big lips the 'thigh gap' of 2015,  I decided to give it a go! I bought this in a local beauticians for 25euro (saucy enough!), but it can also be found on Ebay or Dollywood Boutique online for approximately the same price, once you factor in delivery. Mix Up the Voltage is a peptide and collagen lip gloss plumper. In the cute little box, you get a non-injectable syringe filled with 1.5ml of plumping liquid, and a clear lip loss. The syringe makes this product seem very daunting, and after some considerable warning from the beauticians about the 'tingling' effect of the plumper, I was a bit apprehensive about using this product.


Therefore, I didn't add all the plumping liquid into the gloss, instead I added roughly 1ml of it in, using the measuring guide on the side of the syringe to gauge it. I mixed the lipgloss for around 20 seconds, and then applied to my lips, after about 5 seconds I began to feel a tingle, which grew in intensity until it felt like I had rubbed chilies all over my lips! I must say it is a rather intense feeling.. And definitely better described as a stinging rather than tingling. This feeling lasted about 15 minutes, a lot longer than I thought it would..

Here are my results:

Apologies for the bad quality of the pictures!
Left - Normal lips. Right - 10 minutes after applying Mix It Up. 

As you can see, the lip plumper definitely make my lips look bigger as they were certainly puffy after using Mix It Up, the effect was especially noticeable with my upper lip. I think this product would be perfect for a night out, as you could dab off the lip gloss and put on your favourite lippie and you're good to go! Has anyone else tried Mix It Up? And if so, what did ye think? Did it work for ye? Anyone recommend any other lip plumping products? Stay tuned for a review on He-Shi's Dark Foaming Mousse later on in the week!

P.s. I'm off to Amsterdam soon for a few days, is there anything that you guys would recommend to do or where to eat?

Love,
Becca.
xox

Wednesday, 18 February 2015

The Best Nachos Ever!

What you will need:

Ingredients:
  • 2 chicken fillets
  • 200g bacon lardons
  • an avocado
  • 3/4 spring onions
  • 200g sweet corn
  • 1 tomato
  • 8-10 jalapenos 
  • 300g tortilla chips (I like lightly salted!)
  • 300g salsa dip (I like the Dolmio Hot Salsa Dip!)
  • Cheese - and lots of it.
  • Sour cream (I like the Old El Paso squeezy sour cream - easy peasy!)
  • sea salt
  • pepper
  • sweet chillli sauce.

Equipment:
  • frying pan
  • cheese grater
  • deep rectangular tray

Method:
  1. Firstly, preheat the oven to 180 degrees.
  2. Finely chop the avocado, jalapenos and spring onion. Core the inside of the tomato and finely chop this too.
  3. Add the chopped avocado, jalapenos, spring onion and tomato to a bowl and throw in the sweetcorn too, season this with the sea salt and pepper to taste.
  4. Cut the chicken fillets into bite sized pieces, and fry them and the bacon lardons in a pan with a good lug of sweet chilli sauce, fry until they've gone golden (and delicious!).
  5. Line the rectangular tray with the nachos, then scatter your vegetable mixture evenly over it, and then the chicken and bacon.
  6. Grate the cheese (or make life easier, and buy already grated cheese!).
  7. Going up and the down the tray, and then side to side, scatter the salsa and sour cream over the nachos.
  8. Then, do the same with the cheese!
  9. Pop into the oven for 8-10 minutes.
  10. And.. You have delicious nachos! 


Nachos I made during the week - YUM! 

If you have a secret to delicious nachos, please comment and let me know! Or else, if you try to make my ones comment and let me know how you get on! Have a good weekend <3

Love, 
Becca 
xox

Tuesday, 17 February 2015

Product Review: Anastasia Beverly Hills Dipbrow Pomade!

Hello inter-webbers!

And welcome back to my blog, today I'll be giving my review of the much raved about Anastasia Beverley Hills Dipbrow Pomade. I bought the A.B.H. Pomade off BeautyBay.com over Christmas after much deliberation as a little present to myself. As a self-confessed lover of the HD brows palette in Vamp, I was a bit unsure of trying something else.. However, at only 12e on the BeautyBay website, I couldn't resist! I also bought the A.B.H. number 15 angled cut eyebrow brush for 16.30e and as I also had a few other things in my basket (whoops!) I qualified for a free 2.5ml A.B.H. clear eyebrow gel!
'Dark Brown' Pomade (BeautyBay.com)

So firstly, the product of the moment; the A.B.H. pomade..I bought the shade 'dark brown'. The BeautyBay website advises 'dark brown' for those with medium to dark brown hair, and even though I have quite dark hair I think that the 'dark brown' is a lot darker than I anticipated, and maybe the richer tones of the 'chocolate' pomade might suit my colouring better, which is advertised as suitable for those with warm brown to dark brown hair. I must say this product is amazing for giving you the ultra defined look, that I haven't been able to achieve with any other product (my beloved HD brows palette included), this is also a reflection on the brush which is out of this world! The angled brow brush is the best of it's kind that I've come across so far, and well worth it's price tag.

This product is not intended to be used alone so you also need a powder to pair with this, which wasn't a problem for me as I had my trusty HD palette at hand. I tried outlining and filling in my brows with the pomade, and this resulted in a greasy unnatural looking eyebrows, hardly the 'eyebrows on fleek' look of the moment. However, when I used the pomade to merely outline my brows as intended and filled in using a powder, it gave flawlessly sleek and precise brows that I had dreamed of! Another huge advantage of this product, is that is literally doesn't move.. Whether your in the gym after 50 sweaty minutes on the cross trainer, or it's 3am and you're on your way home from the club, you can rest assured that your eyebrows are perfectly in tact thanks to A.B.H.! It is also important to note, that a little product goes a long way, so this little pot of eyebrow heaven is going to last you well past your monies worth! Also, love the black and gold packaging - very classy!

A.B.H. No. 15 Angle Slant Brow Brush

I am heading to America in a few weeks, and fully intend to go wild when I see the A.B.H. counter, especially for the Brow Wiz, Brow Powder Duo and.. the much coveted contouring kit. If anyone has tried any other A.B.H. products or any eyebrow products in general, please leave a comment and let me know what you'd recommend! Later on in the week, I'll be reviewing the Mix Up the Voltage lip plumper from Dream Catcher. Thanks for reading :)

Love,
Becca.
xox